Gel Nail Perfection: Achieving Professional Results At Home
Getting a perfect, glossy gel manicure no longer requires regular salon appointments or spending a small fortune. With little practice and the right tools and techniques, you can learn to create stunning gel nails that look like a professional did them at home.
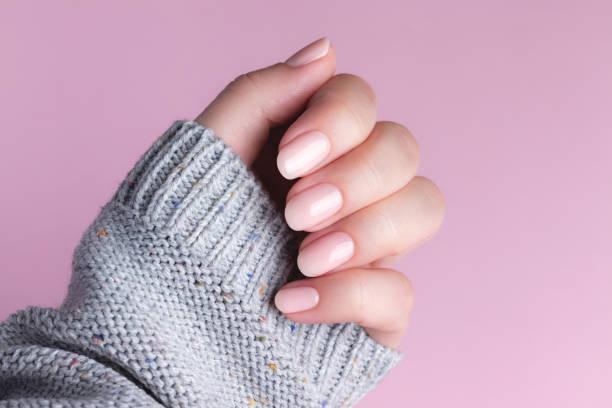
The title “Gel Nail Perfection” says it all – the finished look when you DIY gel nails properly truly lives up to the name. But don’t worry; you no longer have to master complicated sculpting or extensions to get picture-perfect gels. Instead, following a few critical steps for flawless application allows anyone to achieve salon-worthy gel polish results in their home.
This guide will cover everything you need to create stunning gel nails at home, from selecting supplies to perfecting techniques. With some guidance, your DIY gels will soon look like you had them expertly done at the best nail salon in town – no appointment required! Read on to learn all the tips and tricks for gel nail perfection.
Getting Started
With gel nails, the first step is gathering the proper gel nail supplies. You’ll need:
- Base and top coat gel
- Gel nail polish colors
- Gel nail lamp
- Gel nail preparation solutions
- Gel applicators and brushes
- Nail file and buffer
- Cuticle pusher
- Nail tips and glue (optional)
A good nail gel starter kit that includes most of these components can make shopping simpler when you’re first getting equipped. Ensure you choose from thousands of vegan-friendly Bluesky nail gel and other supplies from Bluesky cosmetics. You will get everything you need to create perfect spa-quality nails from the comfort of your home.
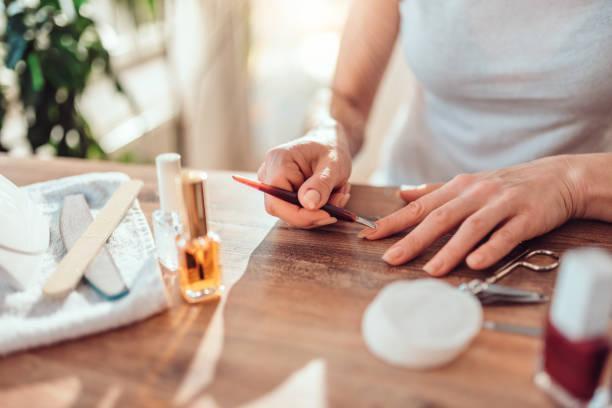
It’s also essential to thoroughly prepare the natural nail first to maximize gel application and wear time. Start trimming nails to the desired length and filing them into the chosen shape. Apply cuticle remover cream and use the cuticle pusher tool to push back and tidy the cuticles gently. Then, scrub your nails with a nail prep solution or alcohol wipe to eliminate oil and moisture.
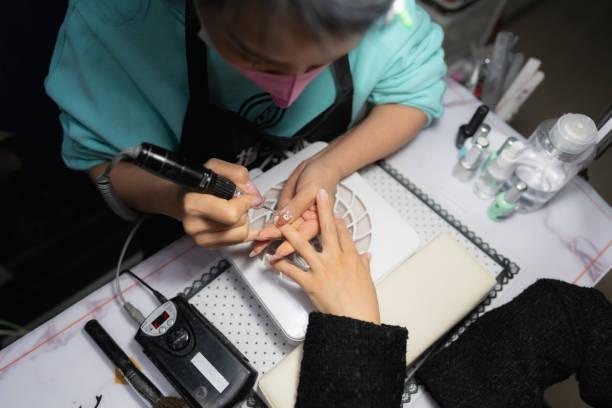
1. Perfecting Your Gel Application
Once prepped, you can perfectly apply gel polish like a pro! Follow these steps for flawless at-home gel manicures:
- Base Gel Application- Apply a thin layer of gel nail base coat over each prepped nail, keeping it away from surrounding skin. Cure the nails under the gel lamp for 30-60 seconds. This creates the bonding layer for the gel polish to adhere to the pin.
- Gel Color Coat- to replicate a salon gel manicure, coat nails with two layers of gel nail polish for full, even color coverage with severe shine and depth. For the first layer, apply gel polish down the center of the nail from cuticle to tip, followed by the sides. Cure for 30-60 seconds between coats. The second layer of color evens out the application.
- Top Gel Coat- Finish with a glossy top coat gel to lock in color and create an ultra-glass-like shine. Apply thinly and avoid flooding the cuticles. Cure under UV light for the final 30-60-second interval. Coat edges with nail oil after curing for further smoothing and gel protection.

2. Shaping Gel Nails
Once you’ve perfected multi-step gel application, the last vital step is proper shaping and structure. Here’s how to nail the finishing touches:
- Carefully file nails in your chosen shape (oval, square, squoval, or round) using a fine-grit nail file. Be sure the edges are smoothed.
- Use a fine-grain nail buffer block to eliminate uneven surface texture for a super slick feel.
- Apply cuticle oil around the nail edges to condition and reduce the chances of cracking or lifting.
3. Gel Fill-Ins At Home
Do you want to remove your gel manicure partially? You can easily do gel fill-ins between manicures to refresh color and lengthen wear time.
- Avoid filing off too many gel color layers, so you have a little surface to bond fill gel. Clean nails thoroughly first.
- Apply base coat only over grown-out sections at the cuticle area and free edge. Cure.
- Complete the fill-in application following the original technique, applying two layers of gel polish for seamless growth and color blending.
4. Gel Remove & Reapplication
You’ll need to fully break down the gel layers for a full gel removal and reapplication every 2-3 weeks. Never attempt to peel off gels, as you can damage natural nails!
Soak Immerse cotton balls in non-acetone nail polish remover and hold over each nail for 10-15 minutes until the gel lifts and breaks down. Afterward, use a cuticle pusher to gently scrape off gel residue without damaging the nails.
Follow with nail prep and file/buff to remove remaining traces of gel and prep nails to accept new layers. Reapply your at-home gel manicure following the same application steps.
5. Caring for Gel Nails
Taking good care of your at-home gel manicure allows them to last weeks without chipping, cracking, or lifting. Here are some easy care tips:
- Wear thin vinyl gloves for cleaning, gardening, dishes, etc., to protect gels from excessive exposure to chemicals and moisture
- Keep free edges very short or neatly filed square to reduce catches and potential breaks
- Avoid picking, peeling, or chewing off your gel polish, as it can pull up layers
- Use cuticle oil daily to keep nails flexible
- If maintenance is needed, opt for DIY gel fill-ins rather than reapplying complete sets repeatedly, which can weaken nails long term.
Conclusion
Getting professional-looking gel nails without leaving your house is easier than ever. Advancements in user-friendly gel lamp technology, long-lasting gel polish formulas, and more brilliant application methods make at-home gel manicure success possible. Investing in quality gel nail supplies gives you the same durable, high-shine finish that used to only come from the pros.
With some thoughtful at-home techniques, you can nail gorgeous, long-lasting gel manicures that look like you just stepped out of the nail salon. Investing a little time in mastering the application means enjoying flawless fingers for weeks minus the steep price tag. Once you get proficient at the gel process, you can offer your DIY talents to friends!